3D WIRE Tree NV14 back to electronics back to electronics
STANDUP Tree PE94 TRI TREE PE94 POSTER Tree RLD neopixeltree Elektor Hypertree line0
   title= TREE EARRINGS NV14 and Misc HOLIDAY ORNAMENTS PE93 VELLEMAN BRUSH TREE
velleman tree kit

!!! *** NEW *** !!!
I should say that these are just a sampling of Xmas trees, most you can build. Many, many more can be found as projects on the web, or as ready to build kits. See my DIY Circuit Board notes.

There are many other holiday ornaments and displays. In getting several magazine subscriptions, as a common thread, there is the Xmas project in most Dec issues, frequently Trees. But since they show up at the end of Nov, its usually too late to make the project for THIS year. And most of them do not provide a pcb image any longer. And others make finding the pcbs to buy difficult and/or expensive(and by the time you find them, discontinued). So they have to be re-engineered. With the schematics and pictures of the boards, some can be reverse engineered. I take an image and redo it in a object design program so I can get useable lines, fills, and vias. If there is no pcb artwork, the project is a full redo from the start, so the article is archived. Same if there is no schematic, time to come up with my own version. Magazines such as Radio Electronics and Popular Electronics are archive on the web, others have digital/back issues available.

The thing to remember most of the time is that boards are made for manufacture and are terrible candidates for home etching as is. The traces & white isolation lines need to be fattened, thru holes need to be bigger and frequently moved from under other parts. Parts have to be moved to allow for the wider traces and asthetics. Double sided boards can sometimes be made into single sided by adding jumpers. Make sure the image is sized properly and mirrored prior to printing. One test I do is to verify the spacing of ICs and strip connectors is at 1/10th inch(multiple). Or use pin spacing of smd chips. I print out the pattern, punch holes, and place many of the parts to make sure they fit.

And now my Projects. These are ordered in three sections... from scratch, buy a PCB, and full kits. And lastly, the ones that if they get made, it will be a clone.


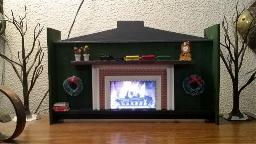
DONE2021: Not a Tree! It's a Fireplace:Med
Miniature warmth of the fire
I have a bunch of small self contained POS displays that run a video file for the product. I can't bear tossing electronics, so I kept them to repurpose. My first is a miniature Fireplace. On my model, it stops after the video is played once, so I just need to add a timed pulser so the display will run continously. There are thousands of fireplace videos on the internet.
Pic 1 Pic 2 Pic 3 Pic Pic Pic Pic Pic Pic Pic
VIDEO 1 1 1 1 1 1 1 1 1


In Progress: Prewire 9' tree: Hard
I created a wiring harness to add rgb leds to old prewired tree.
My brother acquired a really nice quality prewired tree from a design friend 10 years ago. She had it lit all day every day for about 12 years at her store. He got the tree when she closed the store and moved. When we plugged it in, most of the lights did not work. He was ready to toss it(typical over reactor). But I got out regular strings and lit it normally. It was beautiful.
As I took it down and removed the lights, I started to look into the problem. While some bulbs were burnt out, most did not light because the bulb leads(and probably socket termainals too) were tarnished, enough resistance across the string to keep it from working. I cleaned some bulbs with some success, but I decided a complet bulb replacement would be best. Yes, the old holders would have to reused to fit the sockets. It is not my tree, so not my project. I have enough! I ultimately decided to create an RGB wiring harness system anyway, so I could prewire this tree only if it was gifted, or a new one I could buy later. I decided to wire it with rgb lights that come in 50 lamp strings and a 40 amp 5 volt power supply. There will be spider outs for 4 layers, bottom three with 2 strings of up to 75 leds each, top string with 50 and a topper. As of now, I am 90% done with the project.

As an aside, I programmed a pro trinket from adafruit and it lit the leds in a variety of beautiful patterns. An 8 x 8 array was also very interesting, as was my Snowflake tree. The manufacturers controller provided more options. This power supply and cable harness are able to be moved to light other projects. More later.

As a second aside, while working Elections, I remembered I have a number of Hallmark(r) Light, motion, and sound ornaments. They require a standard light string plugged directly into AC mains voltage to work. LEDs will not work. So I am working on a new cable using lamp cord and cut off Lamp bulb sockets that plugs into a 3-6 volt ac adapter that can snake up the tree to power these ornaments. It too will have spider out junctions to feed the ornaments on a 4 layer tree. 4 to 5 amps should be enough.

And yes, my brother decided he did not want the tree. So it is now mine!! In 2024 I will start to strip out the old lights and wire in the new.
Pic 1 Pic 2 Pic 3 Pic Pic Pic Pic Pic Pic Pic
VIDEO 1 VIDEO 2 VIDEO 3


In Progress: Snowflake Tree: Hard
Uses RGB LED Rings and mostly precut thin wood snowflakes from Hobby Lobby and Workld Market.
Notes:I am making a Neopixels Tree:NV 2017 version I call the "Snowflake Tree". Theirs uses Neopixel Rings and a layered tree intricate laser cut from thin wood. Mine is a little easier to make. The base is a six sided bowl from Hobby Lobby. It has a power jack and switch in the back, and 5 LED push buttons for functions. And since they light up, I put tiny snowflakes on them for backlit buttons.
Update:Aug 2022:I started playing around with 5 volt RGB Led strings to rewire a somewhat broken prelit tree. I programmed an Adafruit Pro Trinket, hooked it all up, and bingo! The 50 leds were flashing away in various patterns. I made the wiring modular so I could also plug it into an 8x8 led matrix. It works. Very Bright! And I plugged it into the Snowflake tree that was almost done. No go. Turns out the DI and DO pads keep getting flipped on the rings. One wire change, and it works too! I also bought the 50 led string controller, and it works with all three too. I did learn that you should use a regulator to get the correct voltage for the controller, but it can usually work with the same voltage as the LEDS. So I will test a Wemo mini with my Snowflake tree soon. The goal for the buttons is mode select, brightness up/down, and speed up/down.
Pic 1 Pic 2 Pic 3 Pic Pic Pic Pic Pic Pic Pic
VIDEO 1 VIDEO 2 VIDEO 3


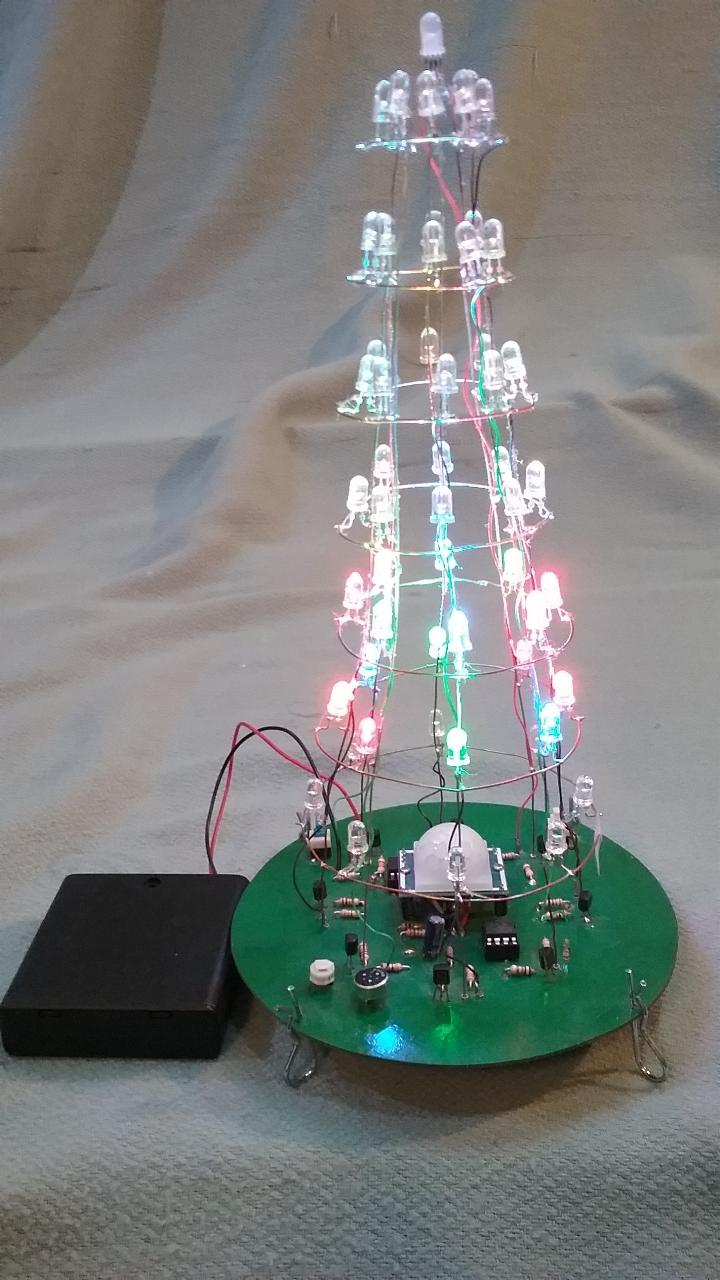
DONE2020: NutsVolt(2014) 3D WIRE TREE:Med
3d wire cone style tree-using a pic and a pir.
A 10" tall tree in 3D. This uses a wire frame cone.
The LEDs attach to the long wires, then the rings for the matrix connections. After assembling it all, it took three tries to find a useable programmer for the chip, but it worked first time out! I bought my first supply of bright clear LEDs for this one.

So far, this is my favorite tree! Truly the coolest tree to build. And it projects light patterns on the ceiling as well.

Notes:I had to redo the PCB. I moved some parts due to traces, and adjusted the driver transistors to make them equally spaced. Also, I used tiny cup sockets so I can remove the wire frame for service if needed.
VIDEO 1 VIDEO 2 VIDEO 3
Pic 1 Pic 2 Pic 3 Pic Pic Pic Pic Pic Pic Pic


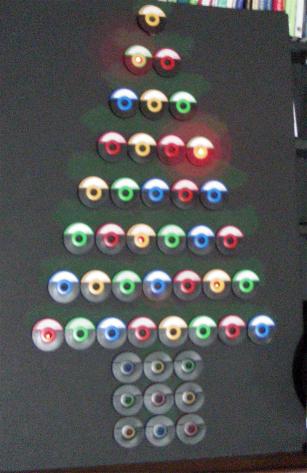
In Progress: RLD(2017) POSTER TREE:HUGE
2ft X 3ft
I had collected a bunch of multi color electronic bits some years ago. I had them in a stack with micro bulb twinkle lights and controller on the back. As I go to sleep many nights I look at it, and with Xmas trees in mind, though that I could make a big tree with those. This is not like the other tree projects.
Pic 1 Pic 2 Pic 3 Pic Pic Pic Pic Pic Pic Pic
VIDEO 1 VIDEO 2 VIDEO 3


In Progress: Elektor(2012):High
HYPER Tree. With a twist.
Flat standup tree-using a pic processor chip with 56 white LEDS. The twist is that two of these can be connected together so the animations move between them. The only picture is stylized with no pictures of an actual finished tree. I suspect this will take a lot of work to make, resulting in a slightly larger final tree.

Once I finally found them, the boards were sold out. But they were also Expensive! A PDF of the boards is available. In starting to redraw this pcb, I noticed that almost all of the LEDs have traces going between their pins! I don't understand why as there is plenty of room to route around the leds. The things some people do!
Pic 1 Pic 2 Pic 3 Pic Pic Pic Pic Pic Pic Pic
VIDEO 1 VIDEO 2 VIDEO 3


DONE1999: Popular Electonics(1993):Med
3 Tree Ornaments based on Electronic Components.
This collection is of three electronic parts-Resistor, Capacitor, and Inductor used for ornaments. I've never had them on a tree, but instead use them for electronic wall art for 20+ years now. The article talks about 5 volt and 12 volt supply. The ICs can use either. I have always used a 5 volt supply with great results.

While the ornaments have been done for a while, I also added a relay ornament using this same circuit type, which I am still tweaking.
Pic 1 Pic 2 Pic 3 Pic Pic Pic Pic Pic Pic Pic
VIDEO 1 VIDEO 2 VIDEO 3


DONE2017:Popular Electonics(1994) TRI-TREE:HARDish
3 wing standup-using hard-to-find LM3909 Led Flasher chips.
I like this tree. Three PCBs, all the same. Each has an LM3909 LED Flash IC on it, using a design with a triple helix spiraling up the boards. I used half of my supply of the LM3909, hard to find now days. I used thru board solder cups intead of sockets to reduce the bulk. If I need, I can recycle them in other projects temporarily. I used 'D' batteries for weight, extended life, and mount the board between the batteries. The LED on top is a two lead 5mm rgb flasher type. The power switch goes on only one of the boards, the one with the battery wires. I also hear that there may be a pic version to replace the LM3909.
More Notes:
Pic 1 Pic 2 Pic 3 Pic Pic Pic Pic Pic Pic Pic
VIDEO 1 VIDEO 2 VIDEO 3


DONE2017:Popular Electronics(1995) Standup Tree:Med
uses 2 timer and 1 driver chips.
This is a single sided board. The pcb image in the old magazine was very fuzzy, so I made one error in redrawing it. It works very well.

I did this one slightly different. It was a little squat and boxy for me, so I elongated and thinned as I could without going double sided. Once I cut out the pcb, I drilled the holes, Check the traces for errors then solder fixed any, then I then spray painted it white. Once dry, I scraped the paint off of the hole pads, actually very easy.
Notes:Use a 74HC04 driver specified. A 74HCT04 does not work right. There was an original pcb error I fixed. I also hot glued and wired in a small switch on the backside so I wouldn't have to take the batteries out all of the time(I should have added this to the pcb). I used 'D' batteries for weight and extended life. This project had an extended pcb for the tree trunk that fit very nicely between the batteries to hold it up. I have used this same mount in another project.
Pic 1 Pic 2 Pic 3 Pic Pic Pic Pic Pic Pic Pic
VIDEO 1 VIDEO 2 VIDEO 3


Planning: NutsVolt(2014):Med
Small Ornament/Earring trees.
Small, earrings/ornaments, one using smd pic processor, and one thru-hole using color changing leds.

I bought a lot of 270 1206 smd Leds from Amazon for one of the smaller ornaments. Next is to get a batch of slow flash rgb for the other ornament.

Note:I bought some things from Silicon Chip in Australia(they have fantastic projects). Among them were 2 sets of three colors of small Xmas tree pcbs and sets of ball ornament pcbs. I will probably use the smd leds on these as well.
Pic 1 Pic 2 Pic 3 Pic Pic Pic Pic Pic Pic Pic
VIDEO 1 VIDEO 2 VIDEO 3


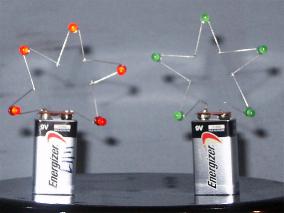
DONE2017: STARS(web):Easy
I found this as I was browsing (instructables). Take 5 LEDs, solder into a star shape, short lead to long lead. One lead to a open 9V battery clip plus, the other to the minus. The green needs a newer battery. The Red can use an older one.
Use care when taking the clip off of the battery.


Planning: BRUSH 1:ZL2PD(web):Med
an artistic paint brush style tree.
This is an adapted design(from an Elektor dec2007 article-tho I can't confirm it) that results in an artistic paint brush style tree, 10cm high. The PCB picture is on their site www.zl2pd.com/xmastree.html.
Very similar to the Velleman brush tree, but this one uses a cd4060 counter to drive the leds.


Planning: Centerpiece Tree: NV Oct2011: MED
This one has 16 spokes in a cone shape.
The LEDs in each spoke are laid out in the same order. The difficulty is in the controller. It uses a Spectrum Lite or Ace 2a board from I2IControls. I can only find old links for this one, but the LED string control info could be used with a different controller in the future to replicate this tree. The picture is from the Nuts and Volts magazine article.


DONE2016: Velleman Tree Kit:
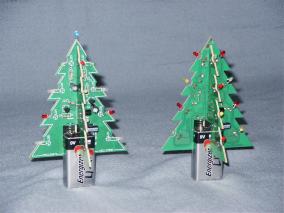
This is a small(4") tree kit I bought at a local electronics store. It has 2 interlocking boards, and sits on a 9V battery. I then wired a small blue led to the top point. I liked this one so much I bought a second kit to make for a friend. He didn't get to do much for the holidays, but enjoyed this tree for several years. He has unfortunately passed away. I will think of him everytime I put this out.

They now make a version of this with a star on top.

Note:Since the boards slide, I recommend running a bead of clear hot glue in a couple of corners.


DONE2020: BRUSH 2:Velleman Kit SMD:Med
an artistic paint brush style tree.
An artistic small tree-striking similar to the zl2pd tree above.

What makes this project difficult is that it is very hard to solder. I do not know what the silver areas on the board are plated with. What I do know is they DO NOT TAKE STANDARD TIN SOLDER. I had to lightly grind them with a mini moto rasp and then touch solder flux to them to get solder to stick at all. Pretinning is an absolute must! Once that is done, use solder wick to create a flat area, then clean off excess flux with a cleaner or lacquer thinner. I have never had this much trouble with a kit pcb except for their programer kit K8045.

After initial difficulties, this kit was easy to build and works great.

Update: I think I figured out why they were so hard to solder...the pads were covered with a clearcoat!

There is another tree similar to this, but it uses transistors and capacitors for the timers.
Pic 1 Pic 2 Pic 3 Pic Pic Pic Pic Pic Pic Pic
VIDEO 1 VIDEO 2 VIDEO 3


DONE2021: Xmas Tree and Baubles from Silicon Chip magazine SMD:Easy
Nice asst of SMD projects fro hanging or use as pins.
I have ordered PCBS, parts, and Magazines from Silicon Chip magazine for a while. I like their products. Get a lot to justify extra shipping! I have seen these trees as a reprint in (Everyday) Practical Electronics. They are easy to solder together. There is a pin header for programming the mpu(the hardest part), and its removeable. The also have Baubles(ornament balls), and an assortment of other Christmas related pcbs.
I would suggest following the design of the Baubles for the trees. The mpu is newer, the Leds are brighter, and you can use any of several patterns.
Pic 1 Pic 2 Pic 3 Pic Pic Pic Pic Pic Pic Pic
VIDEO 1 VIDEO 2 VIDEO 3

**************** Trees that may never get made ****************
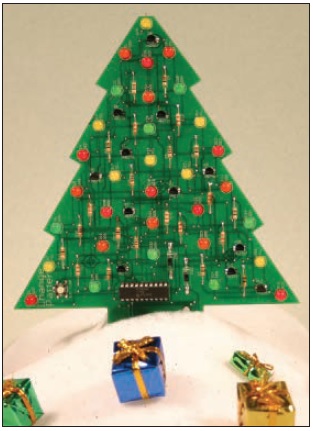

Picmas tree 2008:Large Tree with many Leds.
This tree uses a simple layout of LEDs and components to create a really pretty tree. Visiting their website at http://www.myothermind.com/ shows three iterations of trees, with one just updated dec 2019. The picture is a grab from the nav magazine.

There are no provisions for ordering kits or pcbs on their site.

For me, with no PCB patterns(the magazine shows an xray of both sides), pcb/kits not available through them or NutsVolts, means this is far on the back burner.

Getting to the NAV Store is difficult as there is no link to it on their site!...Store.